How to use Pinpoint Booking System with WooCommerce
This documentation applies to version 2.X of the plugin.If you want to integrate a booking calendar with WooCommerce follow these steps:
Step 1Create a simple WooCommerce product.Step 2Add a price to the product.Step 3Attach a calendar in Pinpoint Booking System tab of that product, select a language and the style of the Add to cart button.
Below is an example of the calendar and the product creation and how they work together.
Create a calendar
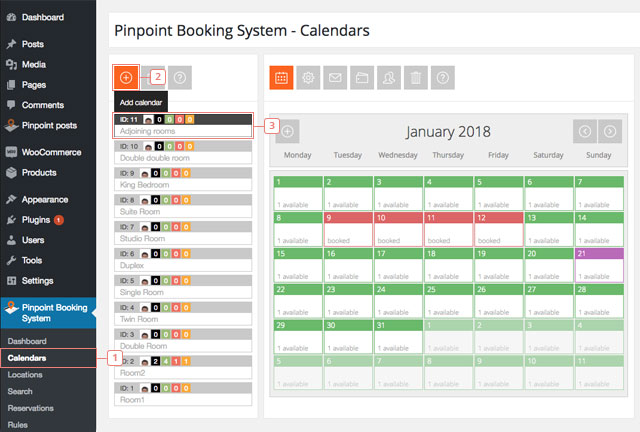
Step 1Click on Calendars.Step 2Click to add a new calendar. If you want to use an existing one, skip to Step 3.Step 3Select a calendar and remember the name and the calendar id. It's recommended to create availability and to add a price before linking it to the WooCommerce product but it can also be updated later.
Create a Simple WooCommerce product and attach a calendar
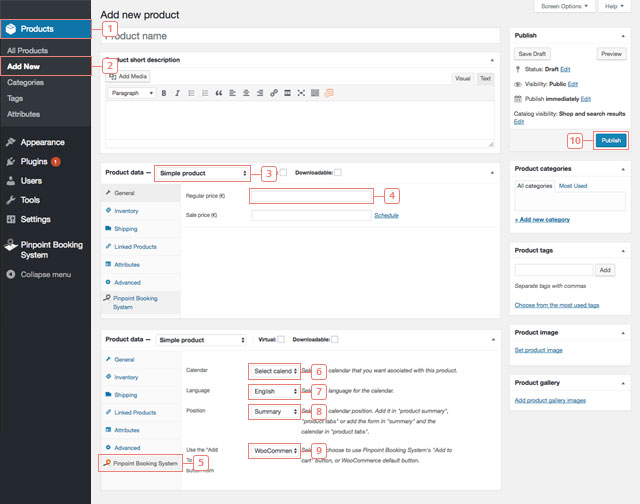
Step 1Click on the WooCommerce Products tab.Step 2Click on Add New. The page where you can add the new product will be displayed. If you don't want to create a new product you should select a product already created from the All Products tab.Step 3Under the Product short description box you have to select the Product Data: Simple product.Step 4Add a price. The price can't be empty. The price added to the cart will be the one you set for days/hours in your calendars but the Add to cart button won't show if you don't have a product price set in WooCommerce.Step 5Click on the Pinpoint Booking System tab of your product settings.Step 6Select the calendar you want to attach to the product (when you click, a dropdown with all your calendars will be displayed). If you don't see any calendars it means you are neither Admin or Calendar owner.Step 7Select the language of the calendar.Step 8Select the position of the calendar( product summary or product tabs).Step 9Select the Add to cart button. You can choose from the WooCommerce button or the Pinpoint Booking System button.Step 10After you finish editing your product, click on Publish to see the changes on your product page.
View the Booking Calendar on the Product page
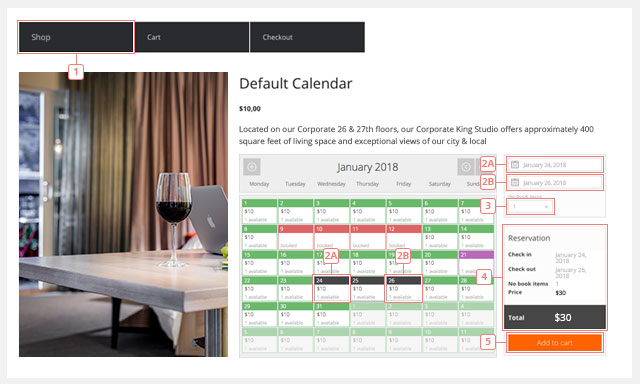
Step 1Go to your product page.Step 2Make a selection from the calendar.Step 3Select the number of items you want to book.Step 4At every step, when you make a change, the Reservation will update. If you add more items or if you choose more days, the prices will update accordingly.Step 5Click Add to cart when you are ready. The add to cart behaviour can be changed. You can make it redirect you to the cart after you successfully add something or you can continue shopping. You can add more reservations from the same calendar or other calendars. If that period will be booked while you are still browsing the website or the periods of time selected overlap, an error message will appear.
View the reservation added in the Cart
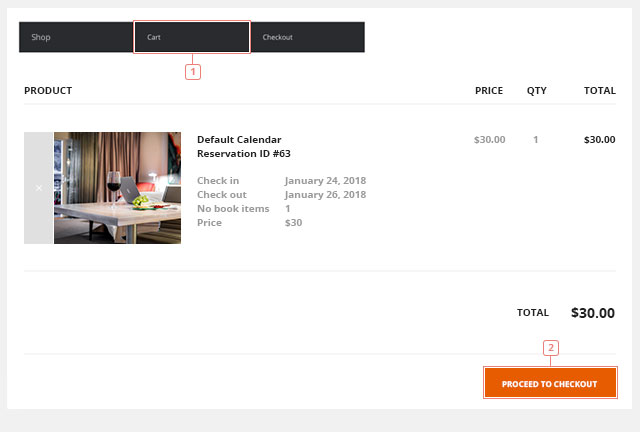
Step 1After adding to cart, you will find the Reservation in it. Besides the price, the reservation contains the name of the calendar, a temporary reservation ID and the booked times.Step 2Click on Proceed to checkout when you are ready.
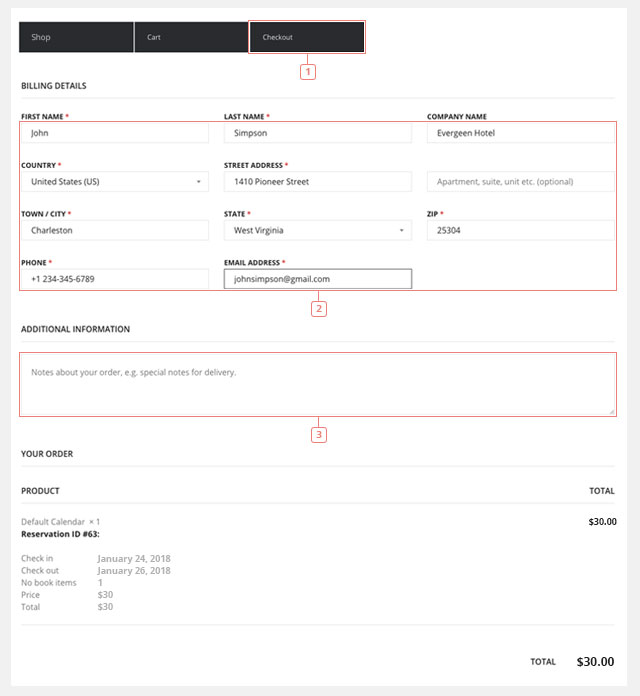
Completing the order
Step 1The checkout page will require the billing address.Step 2The billing address is important because it's used by WooCommerce. At this point, it' no longer part of Pinpoint Booking System and the confirmation email will be sent by WooCommerce.Step 3Add additional information, if it's the case.Step 4Make the payment.
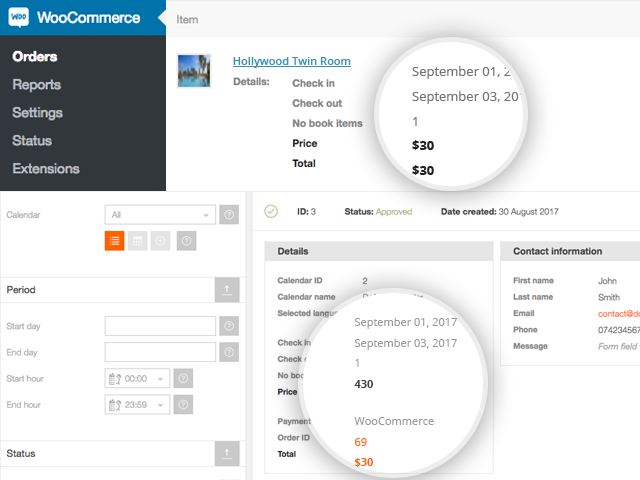
After completing the payment, the reservation can be found in the WooCommerce Orders tab. We also add the reservation in Pinpoint Booking System. It will look like a regular reservation with the Payment methods set to WooCommerce and will have the order ID attached to it. The order ID matches the order ID from WooCommerce.
The selected period for the reservation will be automatically marked as booked.
Good to know:
- The price is calculated from the price you set in your calendar, not from the WooCommerce product price.
- It will not work with a variable product.
- When you delete an order, it will delete the reservation.