Administration - Calendars
Path / Administration areaCalendars This documentation applies to version 2.X of the plugin.Here you can create a new calendar or duplicate an existing one.
When you create a new calendar, you need to configure it before using it. When you duplicate an existing calendar, it has the same settings as the original calendar.
You can add availability, price, status, information for days or hours for each calendar.
Important information:Availability is not set by default (the status for a new calendar is "none"). Because of the big number of possibilities that exist, we cannot set a default for all business models. Follow the below instructions on how to create a calendar and set availability to it.
There are two types of availability you can create:
- Availability for the entire calendar - we will refer to it as default availability.
- Availability for a certain period of time - we will refer to it as custom availability.
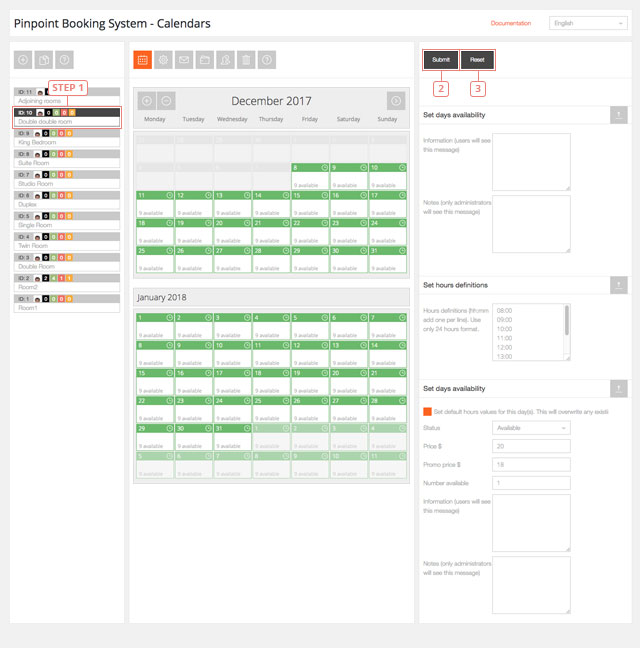
How to set the availability

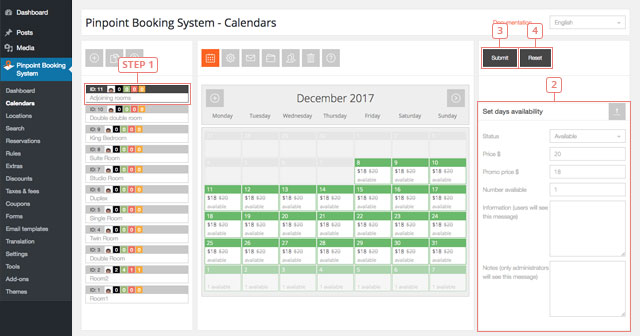
The result of this is the default availability. By doing this you set availability for the entire calendar.
Custom availability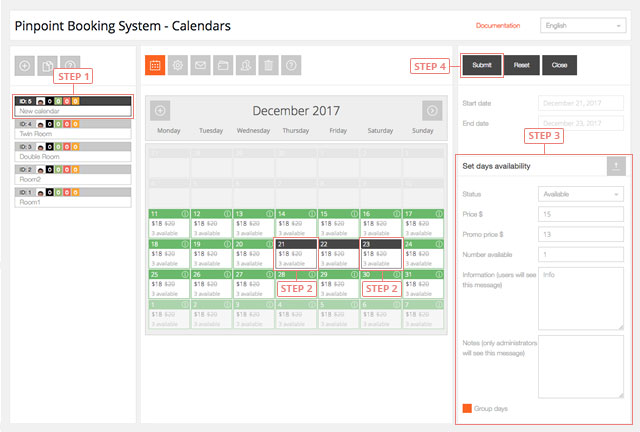
The result of this is the custom availability. By doing this you have set availability only for the days you selected.
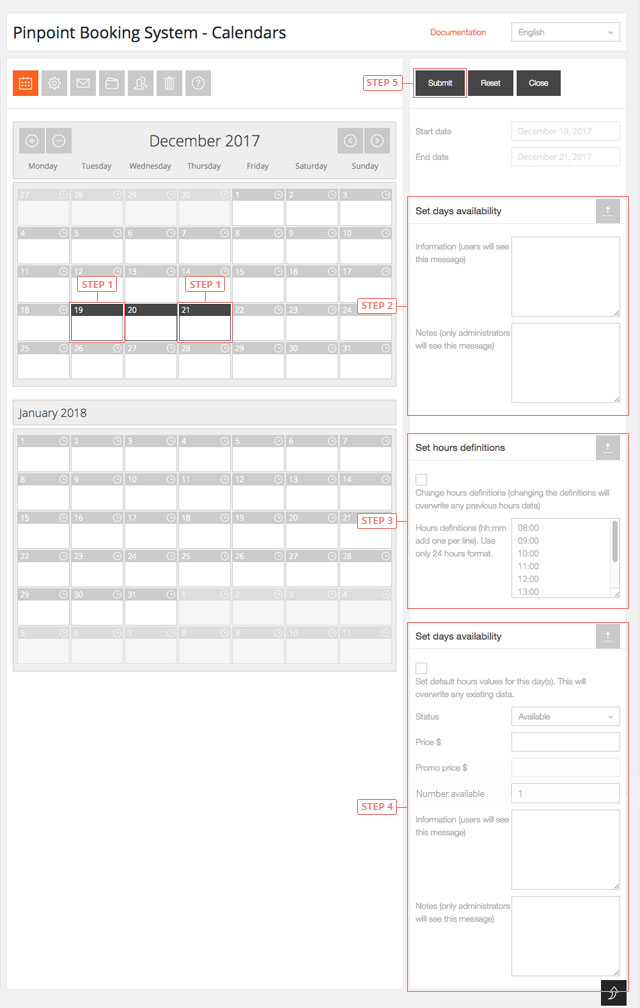
You have now set custom availability for hours on the selected days.
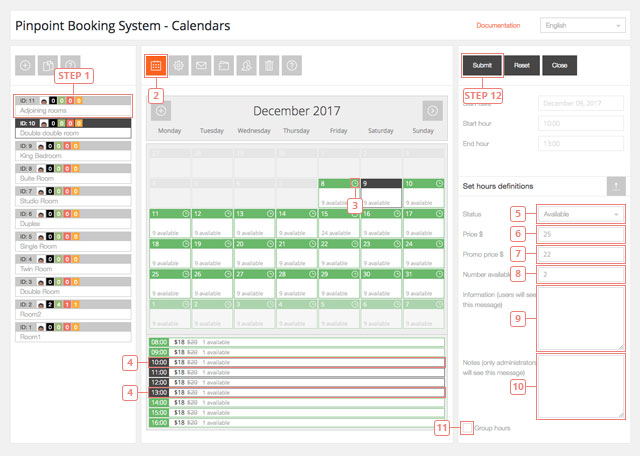
After you press submit, every day will have the hour availability you created:
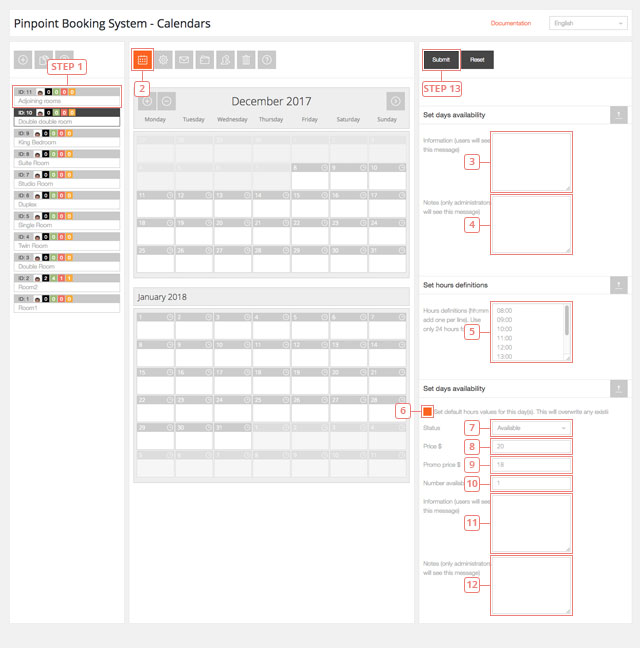
 To edit the default availability
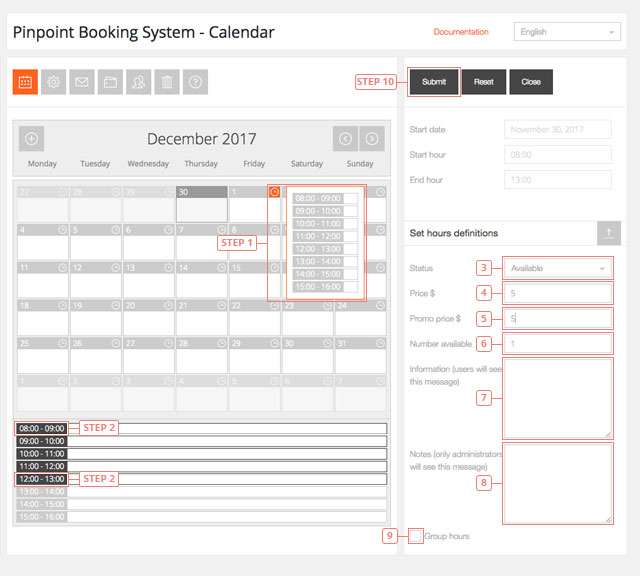
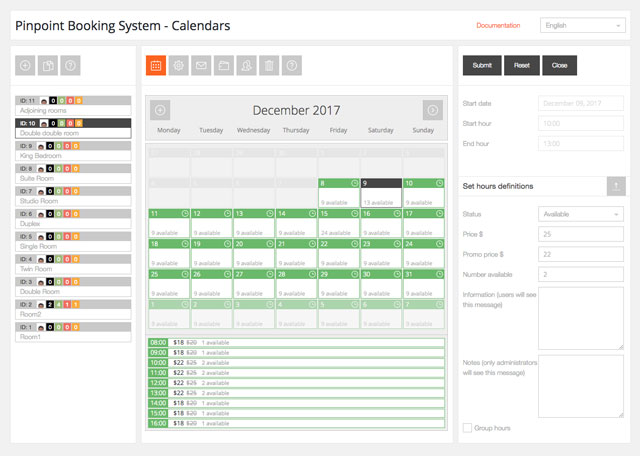
This is the result of the current process.
Creating a new availability for hours that are already reserved will overwrite the availability.
Calendar administration page details
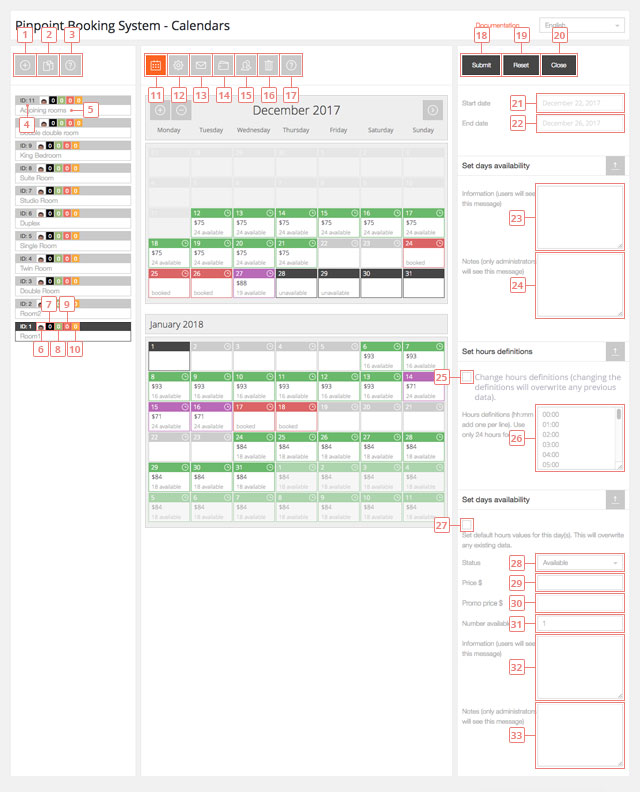
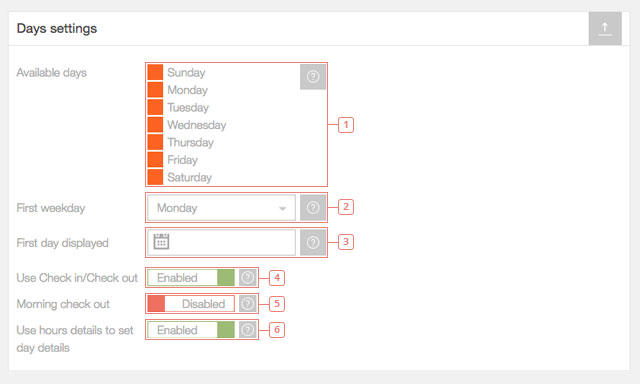
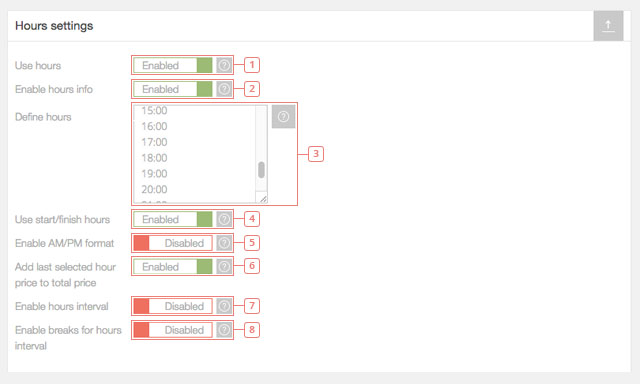
Edit calendar settings

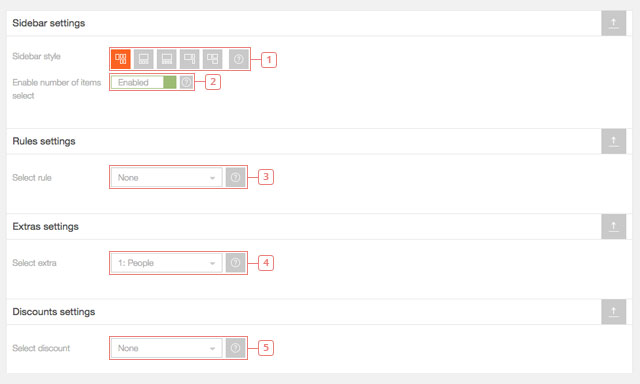
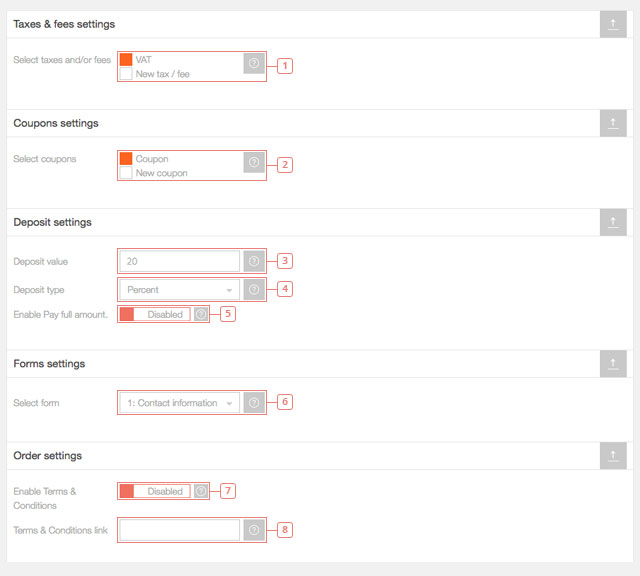
Rules, extras, discounts, fees, coupons and forms need to previously be created in order to be selected.
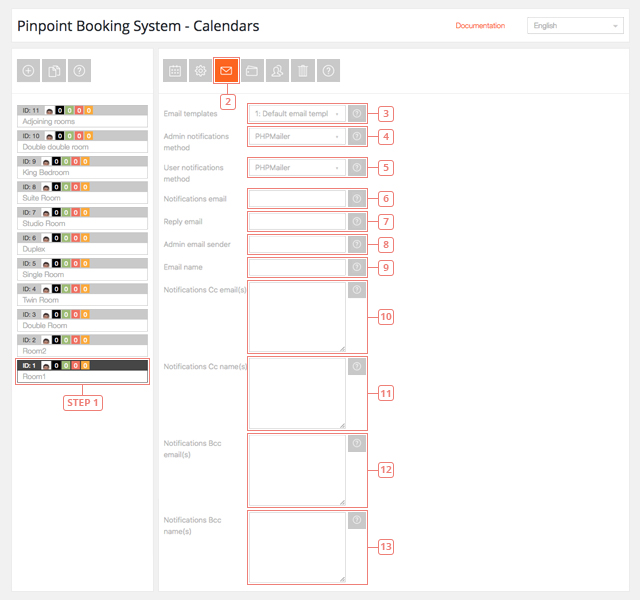
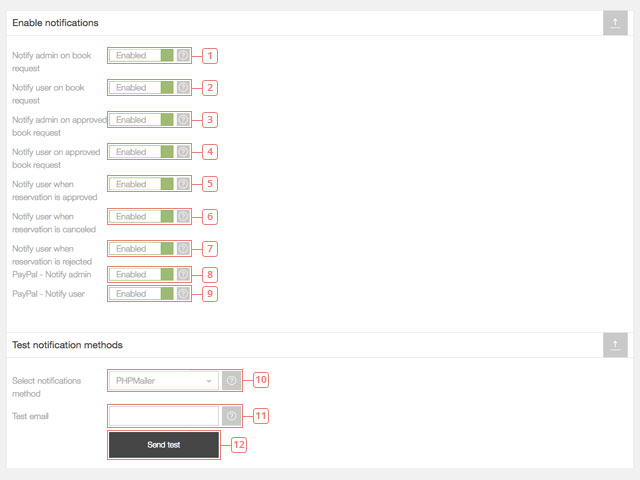
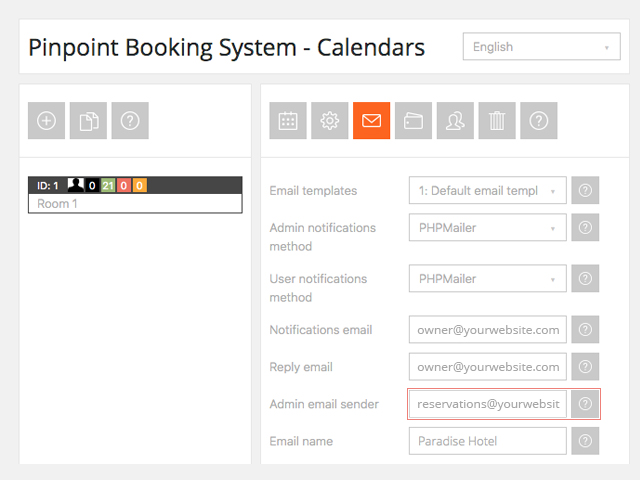
Edit calendar notification settings
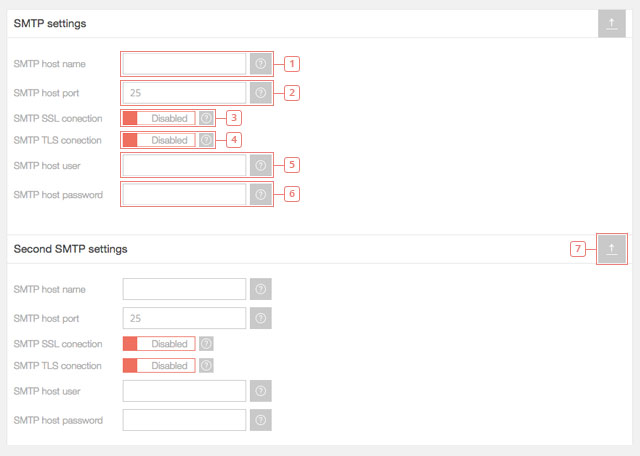
Here you can edit the notification settings for your calendar. You can select the email template you want to use, the method emails are sent, in what situation email notifications will be sent and you can set up SMS notifications via Clickatell.
You can find out more about SMTP here.
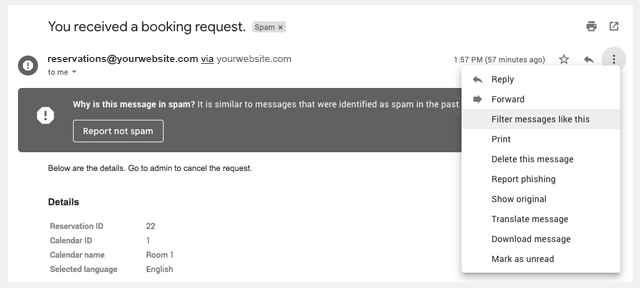
If the email are sent in the spam folder you need to contact the server that has the SMTP.
To receive and send SMS notifications via Cickatell you need to use a Central type Clickatell account.
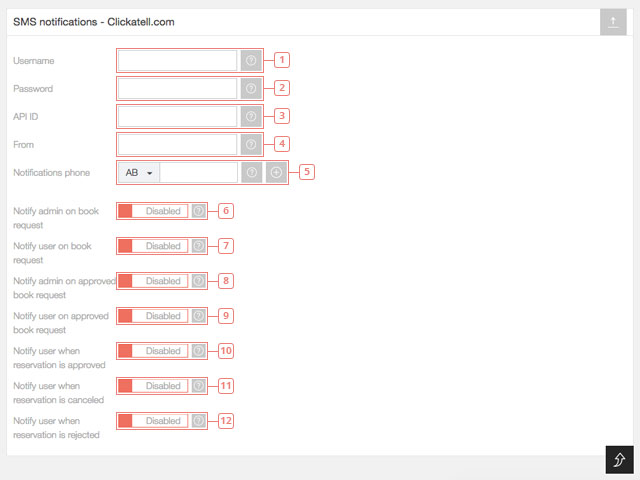
All the SMS notifications are disabled by default because you need credits to send SMS with Clickatell.
Make sure you are using the correct API and that you have credits when you send SMS notifications.
Successfully sending and receiving emails depends on multiple factors. There are two basic methods for sending emails: your Server or SMTP.
The easiest way to make sure your email arrive to their destination is to use your own emailing server and sending emails from an email that is registered on that domain.
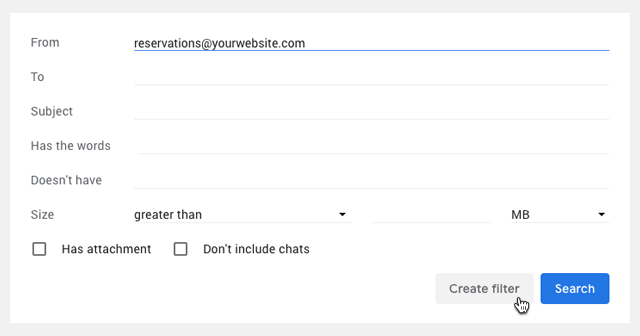
If you don't have an email address you can create one or just make sure you add a fictional one in the admin sender field (not in the reply to field). It has to be from your domain. (for example: reservations@yourwebsite.com)
If you want to receive emails to your Gmail, Yahoo or Outlook account and you don't want to have them redirected from your domain email you will need to do a few more things.
The email sender field is there to help you create a filter in your preferred email client.
If your admin notification emails always end up in the Spam folder, please follow the instructions explained below.
When you want to send emails from an email that is different from your domain emails, we recommend using SMTP.
If the emails are blocked and don't even end up as Spam, you need to check your server email settings.
You can read more about SPF and DMARC. Please contact your host provider to help you implement them.
If your booking notifications are marked as spam in Gmail, please try this.
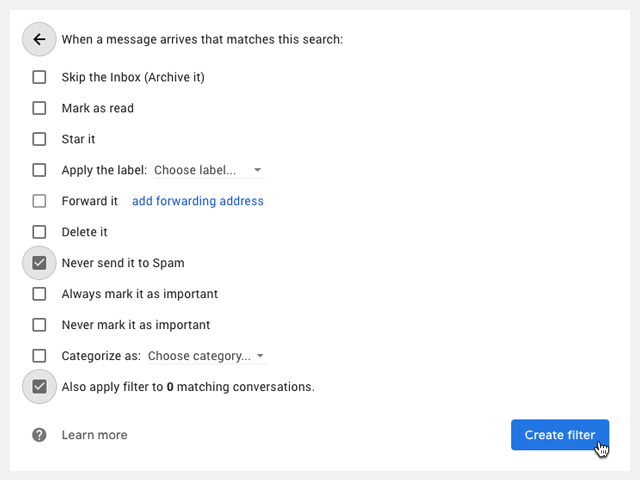
We added this because you wouldn't be able to create filters if the emails are from clients (even if it's via your own mail server).
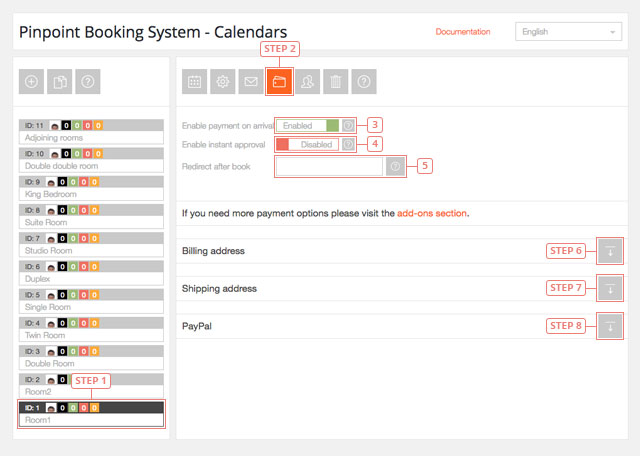
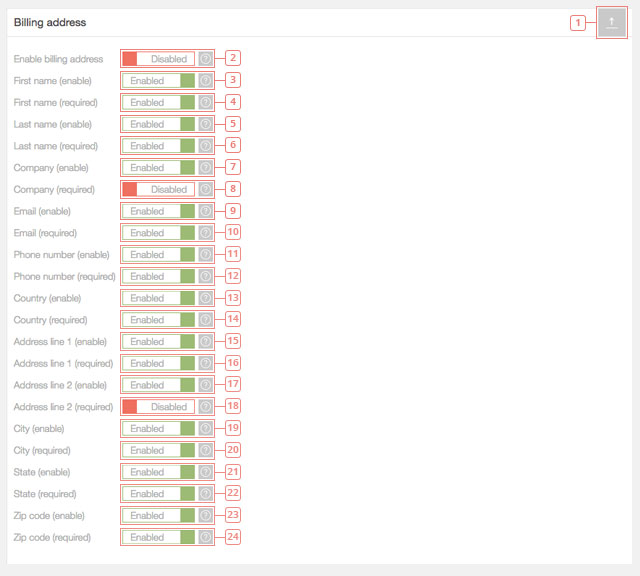
Edit calendar payment gateways
Here you can edit your payment gateways, enable payment on arrival or instant approval of a booking request (without payment) and redirect after the booking is done. If you add any other payment gateways Add-ons, you can configure them here as well.
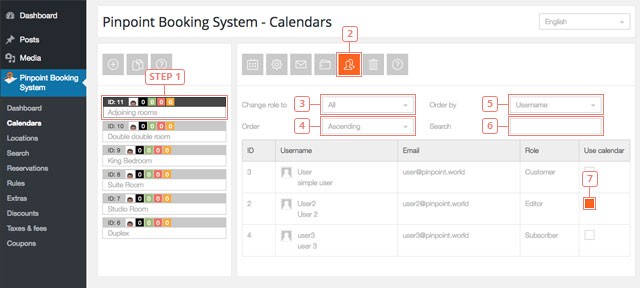
Edit user permissions
Here you can give certain users the rights to use the calendar. By default, only the calendar owner and the admin can view and use a calendar.
Delete calendar
Only calendar owners can delete a calendar created by them.
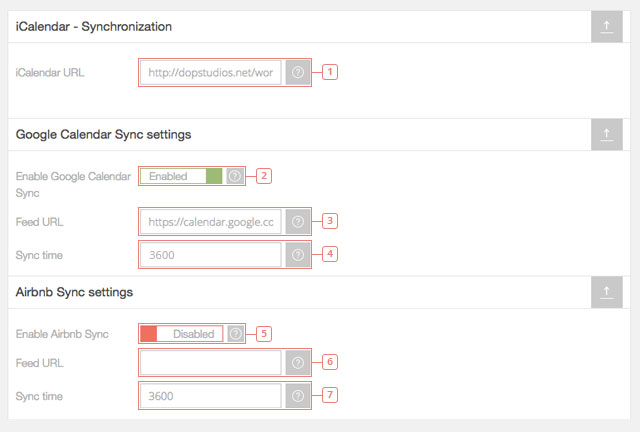
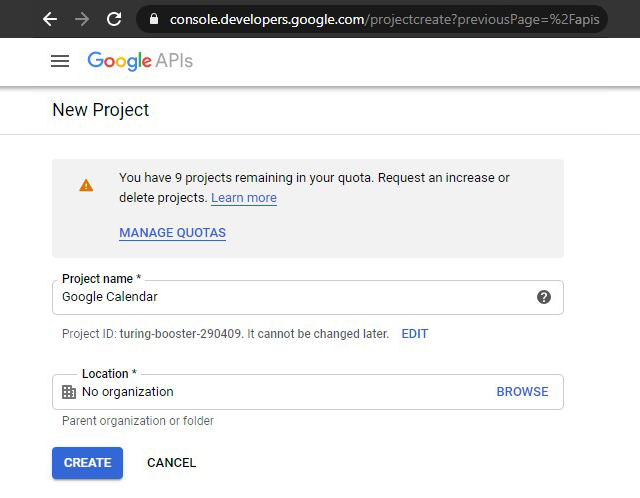
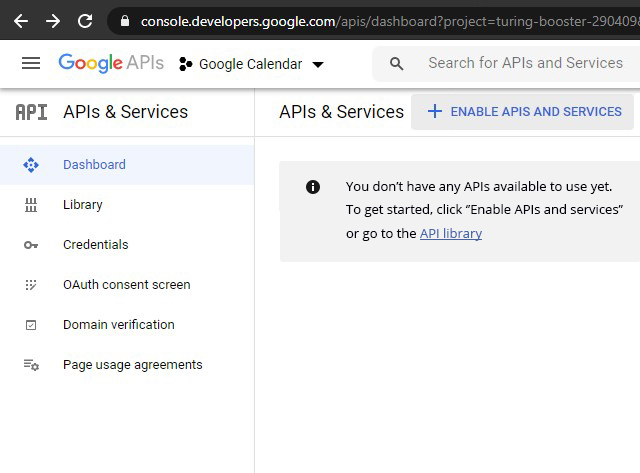
Google Calendar & Airbnb Synchronization
When you sync a Pinpoint Booking System (PBS) Calendar with another calendar, the imported reservations are created as actual reservations and can be managed in the Reservation tab. Reservations created via sync have the details "synced with Google/Airbnb" and the form is empty (cannot be edited yet).
Once imported, the reservations will remain saved, even if you disable the sync. Only the reservations are being sent via the iCal file. This means you can import and export only the reservations. You cannot import or export availability, pending or canceled reservations.
Reservations from Google calendar will be synched. Any new reservation created in the Pinpoint calendar or Google calendar will reflect in both calendars after you refresh. The pinpoint calendar is gonna sync every time you load the calendar or you create a new reservation (to check if another reservation wasn't already made in the Google calendar).
Please use different calendars for each calendar type. If you try to sync days in a calendar that has only hours, it won't work. You will be able to see the reservation but it won't have any impact on the availability.
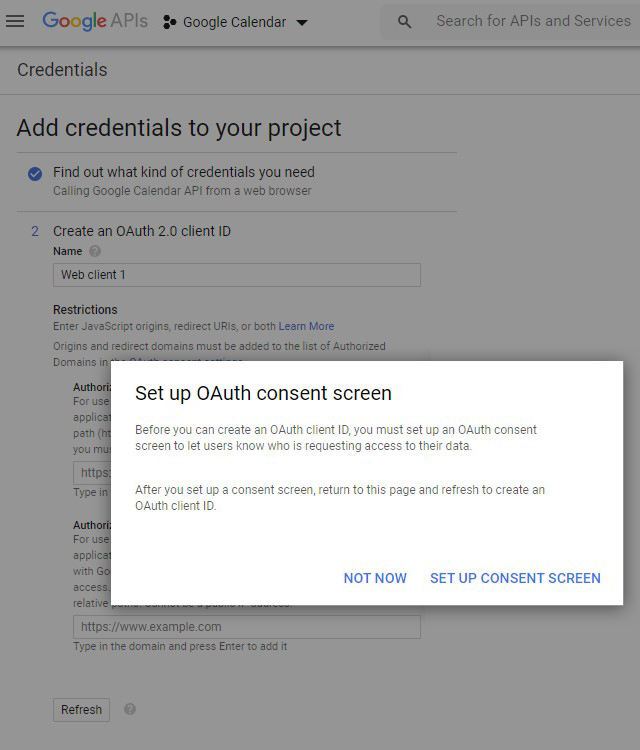
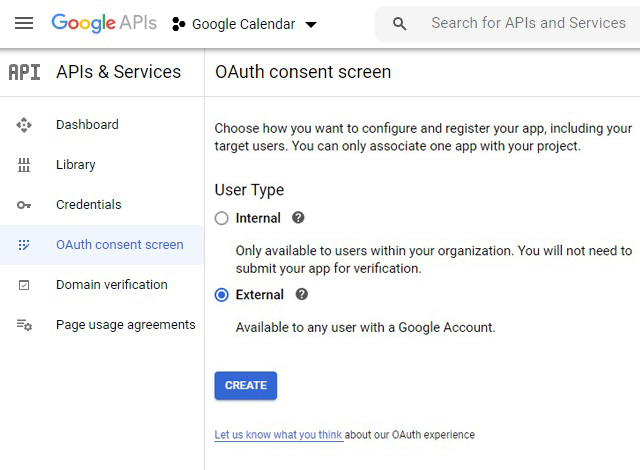
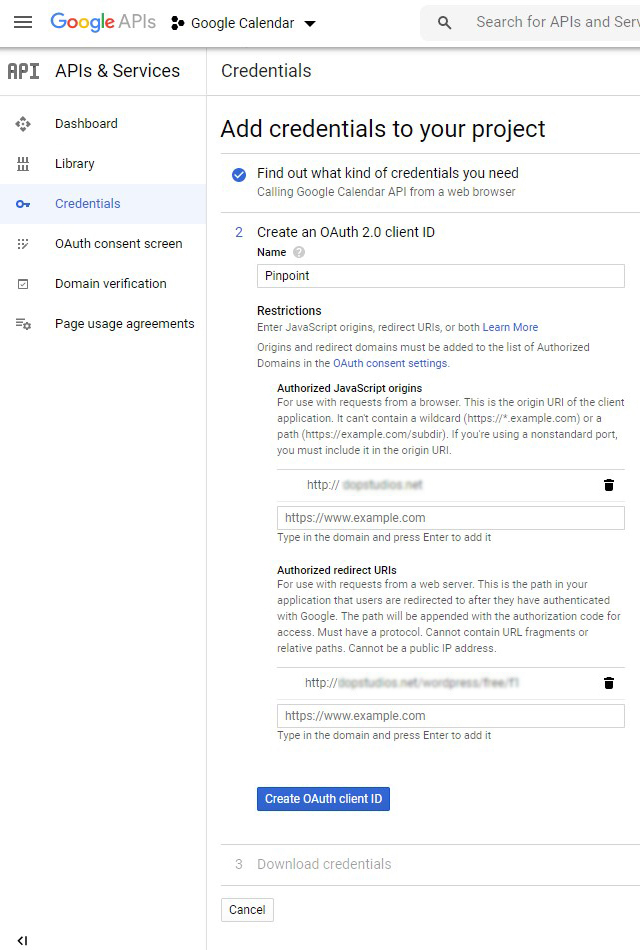
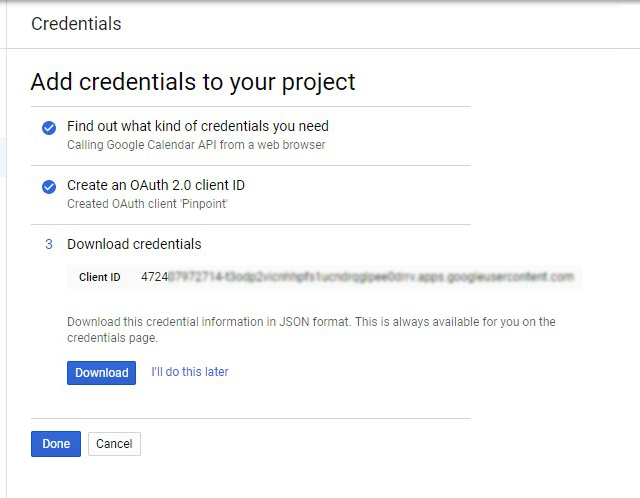
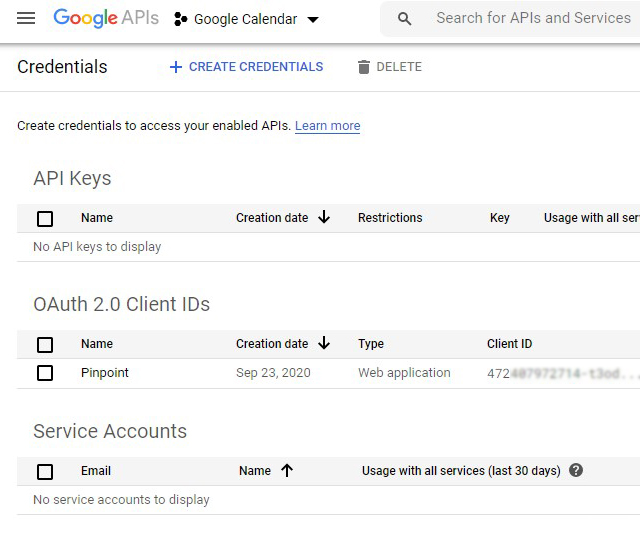
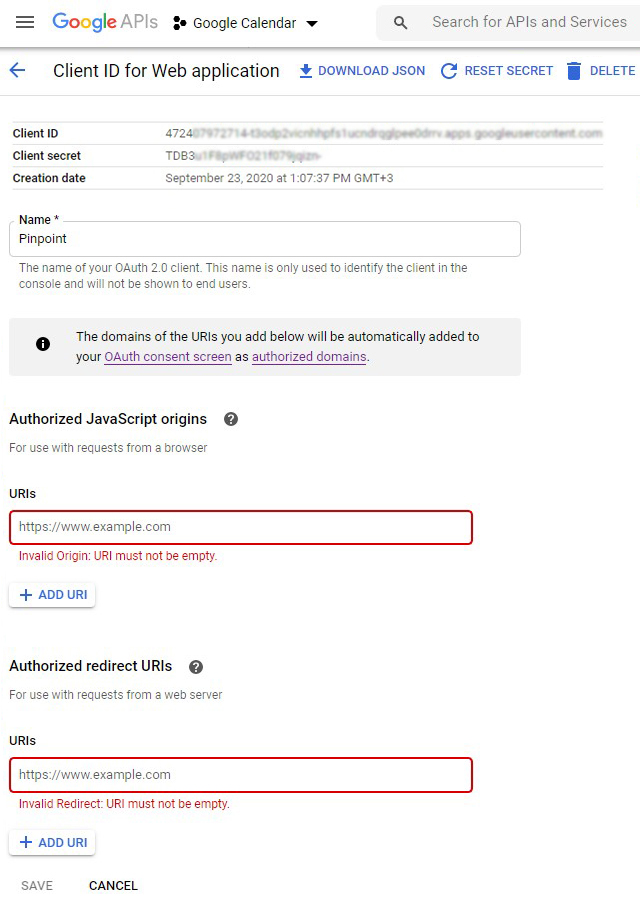
You need the credentials for each calendar but you must do the google calendar authorisation only once and it will create a token that will work on all your calendars.
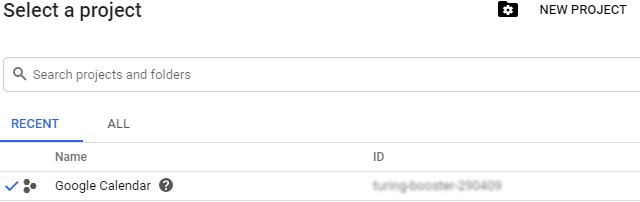
At this moment, only one Google account can make the synchronization.
The first time you sync the calendar, it ignores the Sync time and does it instantly. When you load the calendar, you can already see the bookings from the imported calendar. After the initial sync, it will sync with the frequency you set it to.
In the reservation tab, you will see that all the bookings from Airbnb or Google have a corresponding reservation in PBS.
No matter what Sync time you set, when your clients will try to make a booking we will sync the calendar before sending the booking. This will make overbooking impossible. Example: Your client sees 3 rd December available and decides to book, and, at the same time another client already booked that day on Airbnb. When a client clicks Book Now in Pinpoint Booking System he will receive a message that the period selected is no longer available and he needs to select another date. This affects only reservations with instant approval. Reservations that need to be approved by the admin will still go in the reservation tab but you won't be able to approve them until you clear the reservation that has the same time period in Airbnb or Google calendar.
When a reservation is being exported it will have a standard information (status, calendar name and reservation number)
Please use calendars that are the same type: sync days calendars with days calendars; hour calendars with hour calendars. Example: an Airbnb calendar should be synced only with a PBS calendar that has only days and morning check-out enabled. Don't try to sync an Airbnb calendar with a PBS calendar that has only hours - it won't work!
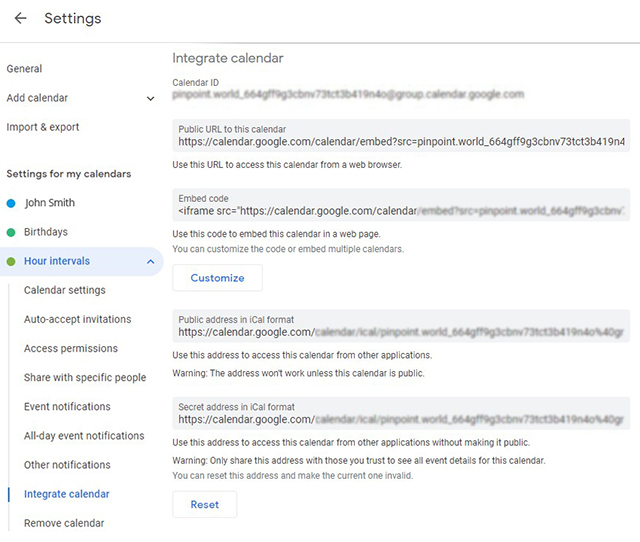
We added an encryption as a security layer for the iCal file. You need to copy the new iCal link and sync it again in Airbnb and Google Calendar. Old links won't work.
For Google calendar:- Sync "all day events" only in the calendar with days in PBS. If the calendar will also have hours it won't work.
- Sync only hour bookings to a PBS calendar where you configured the hours.
- Create a calendar and enable hours.
- If you specifically create the calendar to sync it with Google please create the same type of calendar (if you have bookings from 14:15 to 15:30 you should create a calendar where you declare hours from 15 to 15 minutes). It won't work otherwise.
- Create availability before you enable the sync.
- Set the time zone the same as in Google calendar before you sync the calendars.
// $message = str_replace('|FORM|', $this->getForm($reservation).' | ', $message);
$message = str_replace('|FORM|', '', $message);
In dopbsp/includes/reservations/class-backend-reservations.php remove the comment on the first line and delete the second one.